
How I Made Neon 3D Wave Wall Art: A Glow-in-the-Dark Resin Sculpture
- Arian Lori-Amini
- 6 days ago
- 3 min read
INTRODUCTION: RIDING THE NEON WAVE
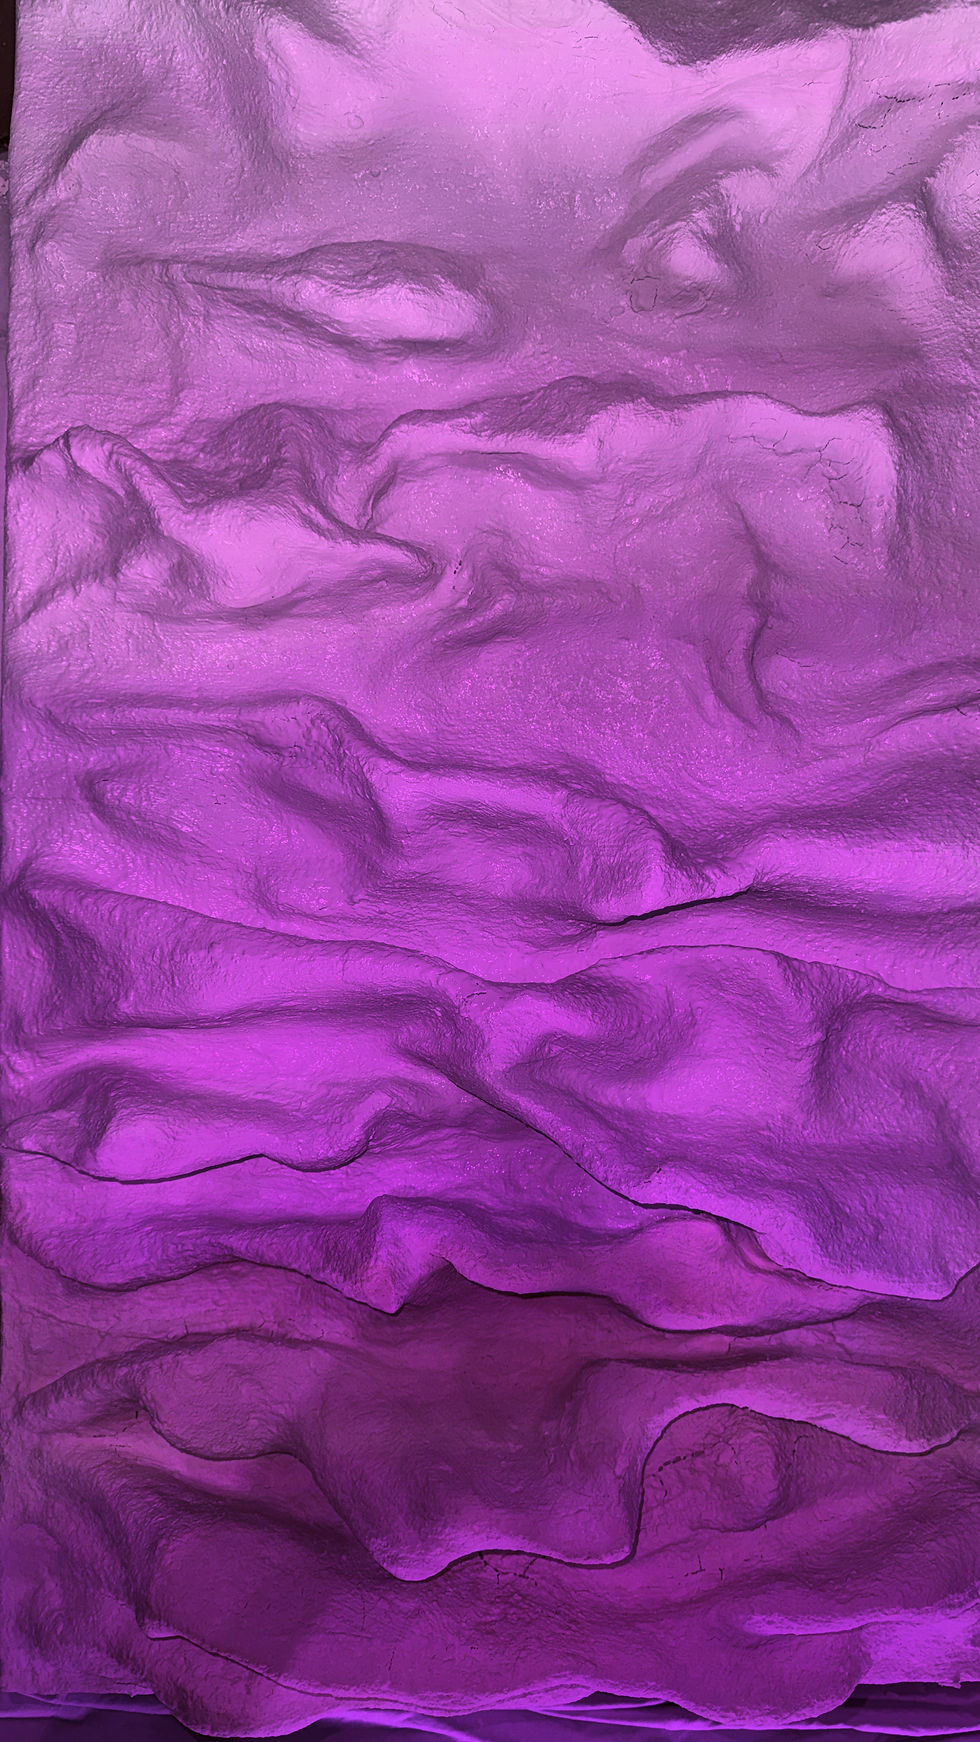
Creating textured, dimensional art is all about bringing movement to a static space. I recently set out to build a piece that bridges the gap between natural landscapes and futuristic vibes. The result? A neon 3D wave wall art sculpture that completely transforms under UV blacklight.
From shaping raw mesh wire to pouring crystal-clear epoxy resin, this piece was an incredible journey of layering materials and colors. Whether you see rolling ocean waves or towering mountain peaks in the texture, this glow-in-the-dark sculpture is designed to make a massive statement. Here is exactly how I brought this artwork to life.
STEP 1: SHAPING THE MESH WIRE FOUNDATION
Every great sculpture needs a strong skeleton. I started with a sturdy wooden board as my base and attached flexible mesh wire across the surface. This is where the initial vision comes into play. By pushing, pulling, and manipulating the mesh, I sculpted a dynamic terrain that mimics the erratic, beautiful flow of ocean currents and mountain ridges. The goal was to create deep valleys and high peaks to catch the light later on.

STEP 2: ADDING TEXTURE WITH PLASTER AND CLAY
Once the wire skeleton was locked into place, it was time to give it a skin. I draped plaster-coated fabric sheets over the wire, carefully pressing the fabric into the folds to maintain the sharp ridges and deep crests.
To give it a truly unique, rock-solid texture, I applied a custom homemade mixture. Blending clay, glue, and a few secret binding ingredients, I coated the entire piece. This layer smoothed out the rough fabric edges while adding a beautiful, organic grit to the waves.

STEP 3: PAINTING THE NEON GRADIENT
With the canvas completely hardened and dried, the real fun began: introducing the neon. I wanted a striking, vibrant gradient that would pop both in daylight and the dark.
Using high-quality, glow-in-the-dark neon spray paints, I attacked the canvas from two different directions. I sprayed a brilliant neon pink from one end and a deep, electric purple from the opposite end. Where the two colors met in the middle, I carefully blended them to create a seamless, glowing transition across the peaks and valleys.
STEP 4: SEALING WITH EPOXY RESIN
To protect the paint, amplify the neon colors, and give the waves a realistic "wet" look, the entire piece needed to be sealed. I mixed up multiple batches of food-safe, clear epoxy resin and poured it over the sculpture.
Applying multiple layers of resin ensured that every single crevice was coated. The epoxy self-levels in the valleys, creating thicker pools of gloss that contrast perfectly with the sharp, resin-coated peaks. It gives the artwork an incredible, glass-like finish.
STEP 5: FRAMING AND THE BLACKLIGHT REVEAL
A piece this bold requires a frame that contains its energy. I mounted the sculpture inside a thick, custom frame featuring a black Plexiglass background and a clean white outer surround. The heavy contrast of the black and white frame makes the pink and purple gradient jump right off the wall.
But the true magic happens when the regular lights go out. When hit with a black UV light and additional accent lighting, the glow-in-the-dark paint ignites. The entire 3D sculpture radiates a stunning, luminescent aura, turning the waves into a glowing neon landscape.
ADDITIONAL ARTWORK DETAILS
Medium & Materials: Mixed media 3D sculpture constructed with a mesh wire foundation, plaster fabric, custom clay and glue composite, and sealed in multiple layers of food-safe clear epoxy resin.
Pigment: High-quality, vibrant neon pink and purple glow-in-the-dark spray paint.
Framing: Mounted on a high-contrast, thick black Plexiglass backing and fully enclosed within a striking white surround frame.
Illumination: Dual-viewing experience. Showcases a highly reflective, glossy neon gradient in natural daylight, and transitions to a fully luminescent, glowing topographical landscape under UV blacklight.
Comments